Saturday, December 31, 2022

Year In Review: Goodbye, 2022!

This year brought a lot of excitement and growth! A key theme of this year's work on the blog was technological curiosity and a willingness to experiment. I focused on fewer posts and more continuity between them, particularly the introduction of and support for the Source Analysis Template. I celebrated my first anniversary in my current position. And, I finally wrote about rubrics after teasing it for roughly three years. Below, find the lessons spotted this year:


Plug and Play: My Much-Anticipated Proclamation of Love for Rubrics


Source Analysis Template Series


Plug and Play: Source Analysis Template
Enough About Me: Putting Your Source Analysis Template to Work

Looking forward to more in the new year! As always, if you'd like to reach out for more support with anything mentioned on the site, don't hesitate to schedule time on my Calendly


Saturday, November 5, 2022

Enough About Me: Putting Your Source Analysis Template to Work

 So, you’ve created a source analysis activity using this template– congratulations! Now you’re ready to make it available to others so they can, you know, analyze the source. 

Regardless of which method you choose, the first step is the same: From the story view, you’ll click the title of your activity at the bottom left, then click “Publish to File” in the menu that appears. This will bring up a window where you can confirm what you’d like to name the file and where it should be saved; an HTML file will then be created.


The menu that appears when clicking the title of your Twine story. 

The nifty thing about an HTML file is that, if you open it in a browser like Google Chrome or Safari, it will open as your game, playable and looking just as you designed it to look. If you open it in Notepad or something similar, however, it will be code– code that you can use! 


This possibility gives us a lot of options for how we might wish to share our activity. I’ve talked about mechanisms for doing this a bit previously, but it’s worth revisiting here to address one of the spaces almost all teachers already have access to: an LMS space. If you don’t already have one, you can usually create one for free, and many receive these spaces from their institutions automatically.


Here is a quick walkthrough on how to incorporate a Twine activity into the Canvas LMS, with concept and code courtesy of Laura Gibbs:

  1. Create your HTML file. 

  2. Pop that file into the Files space. You could make that file visible to your class, but would probably rather hide it from students.

  3. In a new tab, open the Edit view of the Assignment or Page you’d like to add an activity to. 

  4. Click the </> button at the bottom right hand side of the Rich Content Editor in order to open the HTML view. 

  5. Copy and paste this code into the text entry field:

<iframe src="https://___/courses/___/files/___/download" width="100%" height="600"></iframe>

  1. Go back to the tab in which you have Files open. Right click on the HTML file you just uploaded and select “Copy Link Address” from the dropdown menu that appears. 

  2. Go back to the tab in which you have the Edit view of your assignment open. Select the bold text, right click, and paste the link you’ve just copied. 

  3. Save and publish. 


To see this in action, enroll in this demo Canvas space and experiment with the items available in the Source Analysis Activity module (feel free to use a pseudonym). Into this space, I’ve added some examples of what the Source Analysis Activity can look like incorporated into an LMS as a page or an assignment. In the process, I’ve taken the opportunity to update things that were or have broken (for example, the link to the Arbella Speech that I used in the first iteration of the Source Analysis Activity has since become defunct). More significantly, I edited some of the language to apply more clearly to the Canvas environment– students no longer need either so many or so vague instructions about how to turn in their answers if the activity is embedded within an assignment, for example; the activity also no longer needs to collect their name to associate with their answers, but it does still need to instruct students on how to collect and turn in their answers into a format that can be delivered to the instructor by Canvas. 


One of the beautiful things about distributing your activity via an iframe in an LMS is that it works well on mobile– even the process of copying and pasting my answers into the text box was relatively straightforward when testing this on my iPhone.


I hope this inspires you to try this out in your own courses, even if only on an unpublished demo page. If you need a Canvas space to experiment in, you can create a Free-for-Teacher account


If you have questions or get stuck at any of these steps, feel free to reach out in comments, or schedule a quick chat with me via my Calendly

Sunday, August 7, 2022

Enough About Me: Source Analysis Template Walkthrough

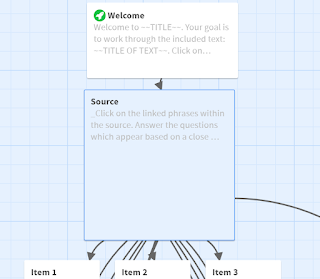
As promised when I introduced the Source Analysis Template, I have also created a walkthrough to using it. If these steps seem like a lot, don’t worry! This is a pretty granular breakdown, and some of these steps are repeats from the download process in the first post.

Setting Up

  1. Download the Twine desktop app from Twinery.org and the HTML file for the template. 
  2. Once you reach the Story Listing in Twine, click “Import from File” on the Side Menu. Click “Choose File,” then select the template file. 
  3. The template will appear as a story in the Story Listing view. 
  4. This is a good point to do the following two actions: 
    • Duplicate the file so that you have the template for safekeeping, and a work file for your new activity. That way, you can go back to the template if needed, or duplicate it for other uses in future.
    • Click the Settings (gear) icon next to the duplicate and select “Rename Story.” Give your activity a descriptive title, as this will appear in the activity once it is complete.
  5. Click on the template to open it.

Welcome

  1. Double click on the “Welcome” passage to open it. 
  2. Replace the all caps text in between the two sets of tildes, as well as the tildes themselves, with text relevant to your activity. (example: ~~ THIS ENTIRE THING ~~ would become Your Text)
Screenshot of demo view of Source Analysis Template info page. Title and Title of Text are rendered in blocky, all-caps formatting.
    Leaving the tildes will result in your text looking like "Title" and "Title of Text" in this 
    image in the finished product-- which, if you like it, great! If not, take out the tildes.
  1. You should also, of course, feel free to edit or omit other text that may not apply to your use of the activity-- for example, if you don't want your students to turn in the answers at all, or if you want them to complete the activity in one sitting, some of the instructions may not apply. 
  2. If you’d like to link to a copy of the source or excerpt, edit the link text given in the Welcome passage in the paragraph beginning “If you’d like, you can pull up a copy of…” Put the URL link itself in the first set of quotation marks, and the text you’d like to link (usually the title of the source) in place of ~~LINK TEXT WITH TITLE OF SOURCE~~. 
    • For example, this:
      <a href="https://avalon.law.yale.edu/ancient/hamframe.asp" target="_blank">Code of Hammurabi</a>
    • Becomes this:
      Code of Hammurabi
  3. This version of the story asks for the student’s name in the Welcome passage , so that their answers at the end will have a name associated with them. If you don’t need this feature, you can delete the question and the code for the input box ({text input: 'studentName'})
  4. Close the passage by clicking the x at the top right. You’re done with this one! 

Source

Okay, this is the fiddliest bit, but I promise it’s not so bad. There’s even a nice visual walkthrough to help you out. Ready?
  1. Replace “~~TITLE OF TEXT~~” with the title of your source or excerpt. 
  2. Replace “~~ADD YOUR TEXT HERE. PUT TEXT YOU'D LIKE TO LINK INSIDE ONE OF THE FOLLOWING:” with the full text of your source or excerpt. 
  3. Identify the words within the source that you would like to link to another passage. Copy ‘em.
  4. Go down to the link list. Replace “~~LINK TEXT 1~~” with the copied text. 
  5. Highlight the entire line. Cut. 
  6. Highlight the words you copied earlier in the passage. Paste. You’re done with the first one!
    • Here's what that process looks like. Every little yellow flash in this clip is a CTRL+C (Copy) or a CTRL+V (Paste). 

  1. Repeat this process with each selection of text you want to link. Delete any links you do not use.

Items

There’s lots of code-looking stuff here, but never fear! Each of these lines that begin with "{text input for:" simply creates an input box where students can write their answers, one input box per line. 
  1. Add any questions or comments you’d like to the Item 1 box corresponding with the text you linked to this passage. 

  2. If you’d like a text input option for students to respond to your questions:

    • Cut and paste the first line of code from the list beneath the relevant question.
    • Repeat for all questions in that Item. Delete any you do not use (or else you’ll have a list of extra input boxes in your passage).
    • Each input option can each only be used once in your story. So, if you used ‘inputA’ and ‘inputB’ in the Item 1 passage, you’ll need to remove these two from the next slide and use 'inputC,' 'inputD,' etcetera. 
  3. If you don't want a text input option, simply delete all text before {back link, label: 'Save and go back to excerpt'}.

Submission Instructions

Okay, home stretch! There’s so little you need to do here, it almost doesn’t seem fair. 
  1. Choose one or both sets of instructions for submitting answers. Delete any irrelevant instructions. 
    • If you did not use any text inputs in your activity, you can delete this passage entirely or replace everything before the {back link} with any concluding text you like. 
  2. Replace “~~YOUR PREFERRED SUBMISSION INFO~~” in the instructions you choose with the email, LMS assignment submission link, or other details needed for students to submit any work they’ve created. 
That’s it! You’ve got a Source Analysis Activity of your own. If you have questions or get stuck at any of these steps, feel free to reach out in comments, or schedule a quick chat with me via my Calendly

P.S: Now that you’ve made this lovely thing, how do you put it out into the world? We’ll talk more about that in the next post. 


Tuesday, June 14, 2022

Flashback Post: Celebrating One Year at Everspring

I'm breaking into the midst of my series on the Source Analysis Template to celebrate one full year at Everspring as of today. This flashback post from June 2021 was my announcement of both my then-recent career move and my then-impending move to Chicago. Many things have changed since then, but two things remain the same: all the enthusiasm and the invitations it contains still hold! 

Downtown Chicago
Photo by Chait Goli from Pexels.

I interrupt my usual programming for a brief life update: At the time of this post, I'm midway through my third week at Everspring. I've joined Everspring as a Faculty Engagement Specialist, working to support our university partners in their online teaching. You can read more about Everspring's work in the recently released impact report. I can't thank everyone I worked with at the Center for Innovation in Teaching & Learning enough for giving me the experience to pursue this work and sharing their wisdom throughout the process of finding my path here. I'm thrilled to be beginning this new opportunity and building upon my existing skills in working with faculty and technology, and I've received a truly warm welcome from everyone I'm working with. 

This is a life update, but it's also two invitations. I'll be moving to Chicago in early August, and I'm looking forward to connecting with old friends and new colleagues once I arrive, so if you're in the area, let me know! I'm also open to talk about my path so far with anyone interested in using their humanities degrees in ways they may not have expected when they began their training, so feel free to reach out to me if it might be useful to you. I'm always happy to chat, and talking to people doing things I thought I might like to do has been instrumental to my own trajectory. 


Saturday, June 4, 2022

Plug and Play: Source Analysis Template

Editing View of Source Analysis Template in Twine

Ever since I created the Source Analysis I activity, I've been wondering if there was a way to reduce the friction of creating a close reading exercise like this even further than just providing an example. Twine is a fairly low investment technology to pick up, but to start from scratch can be intimidating, and there can be a high barrier to trying new things for teachers who simply don't have much time to argue with technology. 

To help with this goal, I've created a template for making a source analysis activity similar to Source Analysis I. I have tried to make it as self-explanatory as possible to use (at least, if you’ve read the previous posts and/or demoed the Source Analysis I Activity), so feel free to download it and jump right in yourself! However, if you’d like a more detailed walkthrough to using it, one is coming. 


This template is good for activities like: 

  • Close reading of a fiction or nonfiction text guided by questions
  • Encouraging annotation of specific passages
  • Creating notes about a source that will inform a paper or exam question

For the particularly imaginative, you could also use it for:

  • Having students read and dissect the key requirements of a paper or project prompt
  • Reflecting on the different formats of a text (what different things did students pick up reading the piece in its original format versus within Twine?)

To start working with the template:

  1. Download the Twine desktop app from Twinery.org and the HTML file for the template.
  2. Once you reach the Story Listing in Twine, click “Import from File” on the Side Menu. Click “Choose File,” then select the template file.
  3. The template will appear as a story in the Story Listing view.
  4. Optional: This is a good point to do the following two actions:
    • Click the gear icon and click “Duplicate Story.” This will make a copy of the file so that you have the template for safekeeping, and a work file for your new activity. That way, you can go back to the template if needed, or duplicate it for other uses in future.
    • Click the Settings (gear) icon next to the file you plan to work in and select “Rename Story.” Give your activity a descriptive title, as this will appear in the activity once it is complete.
  5. Click on your work file to open it.

In creating the template, I worked out a couple of irritations of the original:

  • If using a link to an external site, placing it into the template as provided will now automatically open it in a new tab, rather than either opening in the existing tab (thus navigating away from the activity) or requiring users to right click and select "Open in a new tab" manually (which is annoying to have to remember). This update is thanks to this question and answer in the Twinery forum!
  • The original activity required players to make a slightly unnecessary choice between whether they were going to write down their answers separately or in the input boxes. Although this was useful for the purposes of demonstrating two different approaches, it really wasn’t necessary for a template– if not using the input boxes, the creator can delete them, or the players can ignore them.

You may have noticed it’s been a while since my last post, and that’s primarily because every time I sit down to publish this template post, I come up with a new way to make the template or the instructions better which requires an additional hour of Googling, fiddling, and fighting with Blogger. I then created a bunch of content which felt like too much for one post; I like to keep these somewhat bite-sized. So, I’ve created a lot and split it into smaller, time-released bits, like those pain reliever capsules with the little spheres inside. (Is that what those do? Not sure, but they look fancy, so I’m going with it.)

Now, finally, I’m releasing the template out into the world, with the promise of additional supportive content to come, including a walkthrough (with a helpful video demo or two) and some upgrades to this template that you may like to experiment with. I’m also offering some small-group or one-on-one meetings for anyone who wants support or ideas for using this template; feel free to schedule an open time on my Calendly. And, if you decide to use it to create your own resource, I’d love to see the final product or hear about how you used it!

Monday, February 28, 2022

Plug and Play: My Much-Anticipated Proclamation of Love for Rubrics

A hand holding colored pencils.
Grab your colorful writing implements! It's rubric time! Photo by @alyssasieb.

In the Spring of 2017, long before I ever thought about becoming a CITL grad affiliate or even particularly understood my own interest in teaching, I participated in the "Four Friends and a Book" reading group hosted by a CITL grad affiliate. We read parts of Ken Bain's What the Best College Teachers Do and discussed how Bain's ideas related to our own practices and disciplines. I recently rediscovered the discussion questions and my answers that we each prepared in advance of these sessions, and realized with a start that this was the beginning of the story I promised to tell you so long ago, about how I became a rubric enthusiast.

In the Beginning: A Skeptic

A selected excerpt from my notes on the Pre-Meeting Assignment for Meeting 3, in response to a question about whether rubrics were the tools of excellent teachers or merely time-consuming busywork:


  • I’m struck by “Students focus on grades. Sad, but true” (7)

  • I think this could have potential usefulness for conveying some of those learning aspirations that Bain references repeatedly, though the rubric’s obsessive focus on the grade is why I have shied away from using them before. They always seem to be something that promises to make the subjective objective by putting it in a chart—“mastery of material” or “effective use of evidence” is now clear and undeniably interpretable because it’s in a table!

  • I do like the idea of students helping to create these—that would give me a sense also of not only what they expect but what they know and what I could work on explaining.


This list of reactions struck me as interesting for a few reasons.


  • First, I am notorious (with myself, at least) for taking notes that have no content other than the quotation I thought was "interesting." Can you elaborate, past Leanna? No, I could, apparently, not.

  • Next, wow, was I skeptical! Rubrics "could have potential usefulness"-- that's Leanna-speak for "I guess you may have a small point and I don't like it."


My referenced qualm about the concept of rubrics, meanwhile, now strikes me as being a super-real critique of many rubrics I'd seen as a student and in teaching workshop examples, which I found impenetrable and not very specific, likely because they were trying to be all things to all graders--vague enough you could use them for many different projects or pieces of writing.

What is a rubric?

There are a few different styles of rubric, the most common three of which are well-described in Know Your Terms: Holistic, Analytic, and Single Point Rubrics. I tend to be most comfortable with an analytic rubric, which breaks down criteria of an assignment and helps the grader look at each in isolation to arrive at a total score. For example, the rubrics I’ve featured here previously in posts about teaching The Underground Railroad and The Crucible have been analytic rubrics. 

However, rubrics don’t have to be so detailed to be useful. My simplest "rubric" was one I scribbled quickly on every one of the weekly reflection papers for my Fiction and the Historical Imagination class. It began from the instructions from a document called Weekly Response Expectations:


  • Comment thoughtfully on reading.

  • Use evidence from reading.

  • Tie readings together, either within week or with previous weeks.


Which turned into a little abbreviated list that I added to the bottom of each paper with a brief comment about each:


  • Content

  • Analysis

  • Connections


If you had all three, you had full points. If you missed one or two, I noted they were missing. If you could have done more, I noted which needed a little attention. It's not that this is an example or perfect or ideal rubric making-- this could have been a lot better! But for a frequent and low-stakes assignment, it made life quite a bit easier to organize my thoughts in this way, and it seems to lead students toward some quite intriguing and freeform thinking, which was my hope and my goal.

What Changed?: Why I Like Rubrics

As you can probably tell, my feelings about rubrics changed from the time I was writing about their “potential usefulness” to the time I was creating a new and tailored rubric for every assignment I graded. This moment of reflecting on and talking about rubrics in concert with other teachers set off a chain reaction– I tried it, I liked it, and I didn’t want to go back. So, here's the verbs that rubrics help to do:

Refining

One of the critically helpful things about getting into rubric construction was how it forced me to refine how I was conceptualizing the assignment before grading it-- indeed, before I even assigned it. I wanted students to know how they were going to be graded before they started working on their assignments so that they knew how to prioritize their time and attention, what I was looking for, and so that they had the best chance of actually succeeding at that assignment's goals. So, I needed to figure that out, and often breaking things down into the rubric forced me to clarify my instructions and reflect on what was actually important-- every single one of four criteria cannot be fifty percent of the grade, so how much, exactly, should each be worth in the final score? How can I best express success in each criterion via words on a page to actually make them specific and helpful, rather than leaning on a vagueness like "mastery of material"-- what will showcase that they have mastered the material well, and can I just straight-up tell them to do that in the instructions and isolate it in the rubric?

Prioritizing

Past Leanna was affronted by how rubrics focused on the grade, whereas I apparently saw the process as being more about the mystical process of providing tailored feedback, with the grade hinging upon it but incidental to "the point." I now tend to see "the grade" and "the feedback" as two aspects of the process of grading (which is, obviously, not universal-- if you are ungrading or teaching in an ungraded context, great!). If you can simplify "getting to the grade," you have more time to tailor your feedback. This is something I mention frequently in my current role-- it's not that you are skimping on grading by doing it more quickly; rather, you're making more efficient the parts that are not personalized so that you can spend your time tailoring the more individualized feedback to the student, instead of just writing "Remember to proofread your paper before submitting" on thirty-seven separate papers and trying to ascertain after reading whether this feels like a B+ or an A- paper. 

Guiding and Aligning

When I was a teaching assistant, there was quite a bit of uncertainty regarding the role of the teaching assistant. In many ways, our sections were like our own class, and we ran them in fairly individualized ways. In others, we had little power to craft the class in our own image. The result was quite a lot of inconsistency, as an assignment you interpreted as being "about" one skill or content area might be interpreted by another teaching assistant for the same course to be "about'' a different skill or content area, and the professor leading the course might have still another take. Now that many of the folks reading my blog are likely professors or teachers of some type themselves (hooray!), you have the power to help the folks you are supervising or may one day supervise in your courses figure out how the heck to grade student assignments by creating a rubric and collaborating on minor edits as each assignment approaches in order to align assignment expectations between sections. In an individual way, making rubrics also helped me create consistency across assignments-- is there a reason why I think organization should be thirty percent of this project but only ten percent of the last one? If so, I should make that clear; if not, I should try to figure out how important organization should be to this type of project.


If you have strong feelings about rubrics (positive or negative), you’re obviously not alone. If you want to share them with me, feel free to drop them in the comments! 


Monday, January 31, 2022

Take My Advice: Four Tech-Fueled Efficiency Tips I Wish I'd Known Four Years Earlier

Front cover for the video game Civilization V.
If you'd like a tech-fueled inefficiency tip, this image should serve. 

I have always been technologically curious, but as one grows and changes, perhaps it is inevitable that one realizes what they didn't previously know or appreciate; so too have I realized that there were lots of technological possibilities that I was slow to take up. There seems to be an undertone of skepticism among folks in academic humanities circles about using technology, systems, or techniques for efficiency and an even greater fear of admitting one has engaged in such behavior, and so I perhaps unnecessarily developed an aversion to using it to support my research; though I was keen on incorporating tech into teaching, my process of doing so was admittedly prone to making my preparations more time-intensive rather than less (implied, I think, by my observation in this 2018 reflection on preparing my Fiction and the Historical Imagination course). Part of this, I think, was a symptom of a peculiarly humanistic tendency (or so it seems to me) to feel that to save time is to be cheating in some way; that if our work is valuable it is valuable because we agonized over it at great length, and can be said to have depended upon no one but ourselves and our incredible intellects. Ultimately, however, both students and the work, not to mention my own well-being, have been better served by embracing ways to make life a little easier and a little more collaborative. As a result, in this post, I'm reflecting on four things I came to appreciate in the last two years or so that I really, really wish I'd been doing the whole dang time.

Use OCR

Optical Character Recognition (OCR) is much better than it used to be, and it doesn't have to be perfect to be helpful. I think I became hesitant to try again with OCR after an ill-fated attempt at digitizing a single issue of Cosmopolitan magazine so I could "perform Digital Humanities" on it as an undergraduate. However, toward the end of my dissertation writing process and into my current work I've seen how improved the technology is and how much I now take it for granted. If you have archival photos or scans, try using Adobe Acrobat or a free OCR tool to recognize the text. This will not only make it more accessible if you are distributing it to students, but also make it easier for you to search for terms within it (which would have come in very handy had I figured this out earlier in my dissertation research process, as I worked almost entirely from archive photos and scans while writing).

Use Excel

You know you can use Excel for whatever you want? You don't even have to be a card-carrying "quantitative researcher." Here's one thing I now use all the time and which would have worked well in conjunction with the idea of OCRing things: the UNIQUE function, which can take a list of items and strip out all the repeats, leaving only one iteration of each name, number, list item, etcetera. Imagine how much more easily I could have answered questions about how many disabled children were represented in an issue of a periodical if I'd known this.

Use the Internet

You don't have to do everything yourself. Some subjects have existing resources, whether entry-level memorization and practice activities on tools like Quizlet or Kahoot or mid- to higher-level activities created by other instructors and distributed on educational resource sites like MERLOT or the Zinn Education Project or through affinity groups like the Reacting Faculty Lounge or via personal blogs (hi!). Some activities pitched to high school learners can be employed usefully in a higher education setting with a few tweaks. Some materials can also be created by students as part of their learning process; instead of making a Quizlet for students to practice with, ask groups to create their own Quizlets of the top five or ten topics / terms / concepts and compare their results. 

In short, I wish that I had appreciated earlier how many other things existed that I could use rather than reinventing the wheel every time. Sometimes it seemed like it would have been harder to find and enact an idea elsewhere than creating it myself, but looking a little harder could have paid off-- not only would this have saved me time, but it would have been useful to me to see how other people were approaching teaching various topics to inspire the activities and assessments that I created.

Use a Repetition-Mitigator

Relatedly: If you do have to do something yourself (making an activity, grading), you don't have to create everything from scratch every time. It's great to make something new! As I've mentioned in a previous post on career preparation, if you are an early career teacher, it's in fact essential to make some new things if you'd like to be able to fruitfully reflect on those experiences in later job interviews or teaching statements. However, if you save time on some of the more rote requirements and/or incorporate already existing resources, you'll have more time for creating novel activities and giving meaningful feedback. 

Efficiency in grading is one example of this. Rubrics and comment libraries (either technological ones, like within LMS systems, or low-tech numbered lists you can show to students in conjuction with papers marked with corresponding numbers) can allow you to skip writing "Needs to use at least three sources" in paper comments seventeen times, leaving additional time to write more specific and useful comments like "Your paper's argument might benefit from a closer read of Source A" or "If your goals are X, you should focus on Y aspect of the homework for next week." I only started appreciating what a time-saver this could be late in the game, and I wish I'd used it more thoughtfully and more often.

What tips, strategies, or tools do you wish you'd appreciated and used earlier? Feel free to let me know in the comments-- I just may have to start adopting them myself.

Related Links: 

One of my favorite activities supported by an existing resource: after being asked to deliver a short lesson to a group of epidemiology students on the fly during my time at the Johns Hopkins Center for Talented Youth, I followed a brief lecture on the history of polio with asking students to play the Smithsonian National Museum of American History's Got Ramps? Architectural Barriers Game and compare notes on which endings they achieved. 

If you're interested in the NMAH's work on polio, or thoughts on incorporating museum resources and exhibits into teaching, you may be interested in revisiting this 2017 post on the curator's interview with David Serlin.