Showing posts with label Games. Show all posts

Sunday, August 7, 2022

Enough About Me: Source Analysis Template Walkthrough

As promised when I introduced the Source Analysis Template, I have also created a walkthrough to using it. If these steps seem like a lot, don’t worry! This is a pretty granular breakdown, and some of these steps are repeats from the download process in the first post.

Setting Up

  1. Download the Twine desktop app from Twinery.org and the HTML file for the template. 
  2. Once you reach the Story Listing in Twine, click “Import from File” on the Side Menu. Click “Choose File,” then select the template file. 
  3. The template will appear as a story in the Story Listing view. 
  4. This is a good point to do the following two actions: 
    • Duplicate the file so that you have the template for safekeeping, and a work file for your new activity. That way, you can go back to the template if needed, or duplicate it for other uses in future.
    • Click the Settings (gear) icon next to the duplicate and select “Rename Story.” Give your activity a descriptive title, as this will appear in the activity once it is complete.
  5. Click on the template to open it.

Welcome

  1. Double click on the “Welcome” passage to open it. 
  2. Replace the all caps text in between the two sets of tildes, as well as the tildes themselves, with text relevant to your activity. (example: ~~ THIS ENTIRE THING ~~ would become Your Text)
Screenshot of demo view of Source Analysis Template info page. Title and Title of Text are rendered in blocky, all-caps formatting.
    Leaving the tildes will result in your text looking like "Title" and "Title of Text" in this 
    image in the finished product-- which, if you like it, great! If not, take out the tildes.
  1. You should also, of course, feel free to edit or omit other text that may not apply to your use of the activity-- for example, if you don't want your students to turn in the answers at all, or if you want them to complete the activity in one sitting, some of the instructions may not apply. 
  2. If you’d like to link to a copy of the source or excerpt, edit the link text given in the Welcome passage in the paragraph beginning “If you’d like, you can pull up a copy of…” Put the URL link itself in the first set of quotation marks, and the text you’d like to link (usually the title of the source) in place of ~~LINK TEXT WITH TITLE OF SOURCE~~. 
    • For example, this:
      <a href="https://avalon.law.yale.edu/ancient/hamframe.asp" target="_blank">Code of Hammurabi</a>
    • Becomes this:
      Code of Hammurabi
  3. This version of the story asks for the student’s name in the Welcome passage , so that their answers at the end will have a name associated with them. If you don’t need this feature, you can delete the question and the code for the input box ({text input: 'studentName'})
  4. Close the passage by clicking the x at the top right. You’re done with this one! 

Source

Okay, this is the fiddliest bit, but I promise it’s not so bad. There’s even a nice visual walkthrough to help you out. Ready?
  1. Replace “~~TITLE OF TEXT~~” with the title of your source or excerpt. 
  2. Replace “~~ADD YOUR TEXT HERE. PUT TEXT YOU'D LIKE TO LINK INSIDE ONE OF THE FOLLOWING:” with the full text of your source or excerpt. 
  3. Identify the words within the source that you would like to link to another passage. Copy ‘em.
  4. Go down to the link list. Replace “~~LINK TEXT 1~~” with the copied text. 
  5. Highlight the entire line. Cut. 
  6. Highlight the words you copied earlier in the passage. Paste. You’re done with the first one!
    • Here's what that process looks like. Every little yellow flash in this clip is a CTRL+C (Copy) or a CTRL+V (Paste). 

  1. Repeat this process with each selection of text you want to link. Delete any links you do not use.

Items

There’s lots of code-looking stuff here, but never fear! Each of these lines that begin with "{text input for:" simply creates an input box where students can write their answers, one input box per line. 
  1. Add any questions or comments you’d like to the Item 1 box corresponding with the text you linked to this passage. 

  2. If you’d like a text input option for students to respond to your questions:

    • Cut and paste the first line of code from the list beneath the relevant question.
    • Repeat for all questions in that Item. Delete any you do not use (or else you’ll have a list of extra input boxes in your passage).
    • Each input option can each only be used once in your story. So, if you used ‘inputA’ and ‘inputB’ in the Item 1 passage, you’ll need to remove these two from the next slide and use 'inputC,' 'inputD,' etcetera. 
  3. If you don't want a text input option, simply delete all text before {back link, label: 'Save and go back to excerpt'}.

Submission Instructions

Okay, home stretch! There’s so little you need to do here, it almost doesn’t seem fair. 
  1. Choose one or both sets of instructions for submitting answers. Delete any irrelevant instructions. 
    • If you did not use any text inputs in your activity, you can delete this passage entirely or replace everything before the {back link} with any concluding text you like. 
  2. Replace “~~YOUR PREFERRED SUBMISSION INFO~~” in the instructions you choose with the email, LMS assignment submission link, or other details needed for students to submit any work they’ve created. 
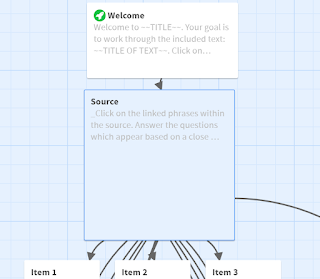
That’s it! You’ve got a Source Analysis Activity of your own. If you have questions or get stuck at any of these steps, feel free to reach out in comments, or schedule a quick chat with me via my Calendly

P.S: Now that you’ve made this lovely thing, how do you put it out into the world? We’ll talk more about that in the next post. 


Saturday, June 4, 2022

Plug and Play: Source Analysis Template

Editing View of Source Analysis Template in Twine

Ever since I created the Source Analysis I activity, I've been wondering if there was a way to reduce the friction of creating a close reading exercise like this even further than just providing an example. Twine is a fairly low investment technology to pick up, but to start from scratch can be intimidating, and there can be a high barrier to trying new things for teachers who simply don't have much time to argue with technology. 

To help with this goal, I've created a template for making a source analysis activity similar to Source Analysis I. I have tried to make it as self-explanatory as possible to use (at least, if you’ve read the previous posts and/or demoed the Source Analysis I Activity), so feel free to download it and jump right in yourself! However, if you’d like a more detailed walkthrough to using it, one is coming. 


This template is good for activities like: 

  • Close reading of a fiction or nonfiction text guided by questions
  • Encouraging annotation of specific passages
  • Creating notes about a source that will inform a paper or exam question

For the particularly imaginative, you could also use it for:

  • Having students read and dissect the key requirements of a paper or project prompt
  • Reflecting on the different formats of a text (what different things did students pick up reading the piece in its original format versus within Twine?)

To start working with the template:

  1. Download the Twine desktop app from Twinery.org and the HTML file for the template.
  2. Once you reach the Story Listing in Twine, click “Import from File” on the Side Menu. Click “Choose File,” then select the template file.
  3. The template will appear as a story in the Story Listing view.
  4. Optional: This is a good point to do the following two actions:
    • Click the gear icon and click “Duplicate Story.” This will make a copy of the file so that you have the template for safekeeping, and a work file for your new activity. That way, you can go back to the template if needed, or duplicate it for other uses in future.
    • Click the Settings (gear) icon next to the file you plan to work in and select “Rename Story.” Give your activity a descriptive title, as this will appear in the activity once it is complete.
  5. Click on your work file to open it.

In creating the template, I worked out a couple of irritations of the original:

  • If using a link to an external site, placing it into the template as provided will now automatically open it in a new tab, rather than either opening in the existing tab (thus navigating away from the activity) or requiring users to right click and select "Open in a new tab" manually (which is annoying to have to remember). This update is thanks to this question and answer in the Twinery forum!
  • The original activity required players to make a slightly unnecessary choice between whether they were going to write down their answers separately or in the input boxes. Although this was useful for the purposes of demonstrating two different approaches, it really wasn’t necessary for a template– if not using the input boxes, the creator can delete them, or the players can ignore them.

You may have noticed it’s been a while since my last post, and that’s primarily because every time I sit down to publish this template post, I come up with a new way to make the template or the instructions better which requires an additional hour of Googling, fiddling, and fighting with Blogger. I then created a bunch of content which felt like too much for one post; I like to keep these somewhat bite-sized. So, I’ve created a lot and split it into smaller, time-released bits, like those pain reliever capsules with the little spheres inside. (Is that what those do? Not sure, but they look fancy, so I’m going with it.)

Now, finally, I’m releasing the template out into the world, with the promise of additional supportive content to come, including a walkthrough (with a helpful video demo or two) and some upgrades to this template that you may like to experiment with. I’m also offering some small-group or one-on-one meetings for anyone who wants support or ideas for using this template; feel free to schedule an open time on my Calendly. And, if you decide to use it to create your own resource, I’d love to see the final product or hear about how you used it!

Monday, September 28, 2020

Enough About Me: Using Interactive Fiction Tools for Source Analysis, Part II


The time has come: It's part II. In my last post, I introduced an activity made in Twine which can be adapted for various sources, allowing students to undertake a source analysis. In this post, I'll show how how it came together. 

How Did You Make This?

Good question! I'll break it down. 

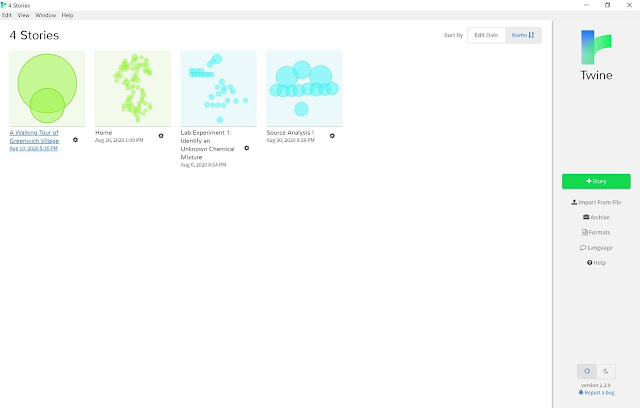
First, I popped open my Twine application, which looks like this: 

Screenshot of my Twine archive. 

To start a new story, I clicked the green button on the right. Then, a blank canvas awaited! I added the first passage. 

The first passage of Source Analysis I, in Twine. 
(Note: the story format I used for this project is called Chapbook.
More on this, and why it's important, below.) 

Each passage represents a different page of text. As you may have noticed, there are a few parts to this passage. The title at the top, which is not seen by the player. The tag section, which I'll ignore for now because I rarely use it. And the text section, which is where you put the words you want students/players to see. 

You may have also noticed a couple of codey-looking things here in the text section. First, the double asterisks (**) surrounding some phrases, which makes them bold. Secondly, the double brackets; these are the most important things you need to make a Twine. Every double bracket makes a link somewhere else, usually to another passage. If you put a double bracket around some text, it creates a link to another passage and titles it with that text. Twine then puts an arrow connecting the first passage to the new passage. (You may also notice the external link above-- more on that later.) After completing Source Analysis I, I had a structure that looked like this: 

The entire structure of Source Analysis I, in Twine. 

You also may have noticed that the two different paths available in Source Analysis I have the same questions, but one allows text inputs and one doesn't. Here's the passage for the first set of questions without text input: 

"there were many that corrupted the service of the Lord" passage, in Twine.

The only code here is {back link}, which provides a link back to the previous passage labelled "Back."

For comparison, here is the corresponding passage from the other track of the activity with the text inputs: 

"service2" passage with text input code, in Twine. 

All that was needed for me to put in the text input boxes was to pop in a bracket ([), tell Twine I wanted a text box (text input for:), specify a variable ('serviceA'), and close with a bracket. I also opted to make them optional (required: false), so that students could move back and forth between pages as much as they wanted. Each of the text input boxes throughout the activity has a different variable attached to the information that the student puts in that box.

I also chose to relabel the "Back" links on these pages, to reassure players that this responses would be saved if they went back (label: 'Save and go back to excerpt').

The last critical piece of this activity is the final page, which returns all of the variables I set on the other pages and lets students know how to turn in their answers:

"Submission Instructions" passage with variables, in Twine. 

When I completed this activity (putting in some truly solid answers if I do say so myself), skipping some questions and answering others, this was what my final page looked like, with the answers I gave replacing the variables on the page above and the unanswered questions simply printing the name of that variable. 

Screenshot of final passage with example answers, in itch.io.

Finally, I published the game to an HTML file by going to the name of the game at the bottom left, clicking on it to bring up a menu, then clicking the last option:

Source Analysis I structure with menu open, in Twine. 

Limitations...

In the last post, I focused on goals and benefits of using this activity or something like it. Now I want to highlight a few limitations and things to consider if you want to use something like this for yourself. 

...of this activity

  • You may notice that if you choose Passage I, the option in which you type nothing, or if you don't put text in a box, the final page shows the variable for the empty boxes instead of just being blank. There are ways in which to make this display differently, but I wanted to keep this example relatively simple. If you're curious, feel free to reach out. 
  • I noticed that Print To PDF for the end page did not work well on itch.io, but it did all right when I tried a version of the game posted within an LMS. So, your mileage may vary on being able to capture the last page in a PDF versus other methods like screenshots or copying and pasting the text. 

...of Twine

  • Twine remembers things in the browser. As the beginning screen of this activity notes, that means that someone who wants to do this activity needs to use the same browser all the time. They should not use incognito mode if they want to save their progress (and depending on the game, it may not work in incognito at all). This also means that anyone opening the same browser on that computer will open the activity to the same point and with the same information still saved in the input boxes, so remember this if you have anyone sharing devices. 
  • Depending on how you host your Twine, it may not show up on mobile, or display awkwardly. (You used to be able to use philome.la and it was so easy--- but alas, it is no more. Here's hoping someone picks up this torch). To ameliorate this issue, there are a couple of things you can do; I'll offer what I think are the two easiest.
    • You can upload Twine files to an LMS and play right within the LMS page-- different systems all handle this slightly differently. I tried with this game on an old Compass page and it seemed to work well in both the Blackboard Instructor app and in a mobile browser. 
    • You can also upload your game/activity/interactive whatnot to itch.io. After you create an account, you can upload games and activities' HTML files (which is what Twine gives you when you publish your activity). This is where, as you may have noticed, this activity is hosted. Itch.io offers a lot of options-- you can fiddle with the size of the display (Source Analysis I is 650x900), check a box to enable mobile-friendliness, etc. Lots of Twine games are hosted there.
  • Lastly, Twine can incorporate photos and audio, but the image and audio files themselves can't live within the game file, which can get a bit tricky. I would rate incorporating those things as a bit more advanced than you may want to experiment with on your first go-round, but it is doable. 

I want to experiment with Twine! 

Hooray! Just visit https://twinery.org/ to get started. You can use the tool in your browser, which will save your work to the browser, or you can use the downloaded version (I prefer this). 

Please note: Like player progress, Twine also saves your projects in progress themselves in your browser (whether you use the desktop version or not), meaning that deleting your history, cookies, etc can wipe away your games too. To avoid disaster, archive often: From the story list, click the "Archive" button on the right, then save the resulting file to a location you can find later. This will bring your entire library back if you lose it!

I want to make something like this or edit this to make my own thing!

Hooray! Feel free to use this framework in your classes,  and change it however works for you. (If you publicly post any versions, a linkback here would be nice, and I'd love to hear about your project!) All the text in the project can be found here (so if the screenshots above are difficult to read, you can find all the text they display here as well).

Please note: There are multiple story formats (that is, highly specific programming languages) for Twine, meaning that depending on which one your Twine is set to,  some commands or features are done differently. This activity uses the Chapbook story format, which is relatively new and easier to learn than older formats. If you'd like to use Chapbook, set that as your format by clicking the title of your game while you're editing it, then clicking "Change Story Format" and selecting Chapbook. If you want to learn more about what you can do in Chapbook, see the Chapbook Story Format Guide.

However, all story formats will let you use double brackets to let you link between passages; for example, [[Passage I]]. If that's all you want to do, you don't need to worry about story formats.

Questions? Ideas for using Twine in other ways? Let me know! 

Monday, August 31, 2020

Enough About Me: Using Interactive Fiction Tools for Source Analysis, Part I


A scrolling text gif: Home. There is a blog post open on the screen. Input: Read blog post
Scrolling text gif courtesy of Screedbot.

I've recently been rediscovering my love of interactive fiction, a formative medium for me when I was growing up. 

A Brief Intro to Interactive Fiction

Interactive fiction (IF) includes several different classifications of thing, but usually the term refers to text-based (though not necessarily exclusively text) software games or stories which allow players to have some amount of control over how and/or when the story unfolds. There are two main styles of IF: choose your own adventure (CYOA) style, which offers a limited number of options that you can click on (similar to the old Choose Your Own Adventure books, which had you make decisions by flipping to a particular page), and parser IF, which allows you to type in the actions you want to take within the narrative. Some interactive fictions are more focused on telling a story,  while others are more focused on creating a game experience (solving puzzles, winning). 

Screenshot from CYOA style game Birdland, by Brendan Patrick Hennessy. Surprisingly, unrelated to my Fiction and the Historical Imagination course. 


Screenshot from parser IF game Counterfeit Monkey, by Emily Short.
Image: Media Archaeology Lab. 

Before recently, I had never really tried to make my own games, content to play others (almost entirely parser IF); however, more recently I've been working on a few personal projects in the CYOA style. In this post, I want to talk about a couple of ways to use a tool often used for creating CYOA-style interactive fiction in the classroom: Twine.  

Make Your Own Adventure

When I sat down to write this post, I thought that I'd talked before here about using Twine for history courses, but it turns out that I've only briefly mentioned the beginning of the Western unit. So, I'll preface this by saying that I've used Twine before in the classroom, assigning students to make their own takes on the Western genre which incorporated gamified or choice elements. Twine is a great tool for this sort of thing because it is very easy to learn enough to get started making a narrative. My Fiction and the Historical Imagination students used Twine for a "hackathon," spending the whole of a 50-minute class period putting together their games in small groups, and did a fantastic job embracing, challenging, and pushing the limits of the Western genre. 

So, Twine can pretty easily be used as a student assignment tool. However, there are also ways in which instructors can make something in Twine to assign to students. Here's one example that works well for history: source analysis, especially close readings of shorter texts. So, being curious about how this might look, I knocked out a potential example, which you can experiment with either in the embedded version below or directly on itch.io.


"Source Analysis I" (a creative title right up there with my childhood stuffed animals "Lamby" and "Mr. Bear") took me about an hour and a half, not counting all of the other distractions I got up to along the way like changing the wording around, taking screenshots for this post, and testing it on a variety of devices and browsers. The goal is for students to click on the parts of the text that are linked to questions related to that phrase or idea, and answer the corresponding questions. As you may notice, this version of the activity offers students the option to collect their answers in their own document and turn that in, or type their answers directly into text boxes under each question; the answers are then returned to them all together at the end in a single page that can be emailed, printed, or submitted to an LMS. One could also assign only one or the other format; I wanted to include both in this activity to illustrate that there are multiple options for doing this sort of activity (and you can offer all, some, or only one to your students directly), and that one takes almost no "coding" and the other only minimal coding.

How much coding, you ask? In part II, I'll walk through the process of creating the activity, and talk more about the limitations of this particular version and of Twine overall. For now, though, I'll leave you with some of the...

Benefits of this activity

One of the things that can often be difficult about reading for college courses is figuring out how, exactly, you are supposed to read something. In history courses, we often want students to skim the textbook and pay close attention to the details of a primary source, but it can be difficult to explain and emphasize this distinction in a way that feels natural.  I like that rendering a passage in Twine this way, with particular segments linked to related questions, makes the act of close reading feel more intentional, and the source as a whole a bit less daunting. Selecting a particular phrase and digging deeply into it becomes a more finite undertaking; it is no longer a long sheet of questions but rather a series of small tasks directly embedded into the text itself. 

This version is a bit handholdy, suitable for an introduction to this sort of close reading. One could climb a bit higher on Bloom's Taxonomy by asking one or more follow-up questions; I like the idea of asking a student what segment of the text they would highlight and questions they would add if they were going to edit the game themselves. 

I'll be back with part II soon, with a detailed walkthrough of how to make a similar activity. If there are any particular questions or features you'd like me to address, feel free to drop them in comments! 

Related links:


If you want to try playing interactive fiction yourself, the Interactive Fiction Database (IFDB) is a great place to start. (You might find this friendly beginner list or this other friendly beginner list useful.


The Interactive Fiction Archive might be of interest to digital humanists/technology historians.